For a whole week, the Indian offensive in the Sialkot Sector had failed to cross the general line of the railway that ran from Sialkot to Narowal. The Second Battle of Chawinda opened on 16 September with a second full-scale offensive by the Indian I Corps. It aimed to initially capture Badiana, Chawinda and Zafarwal, the three pivotal positions held by 6th Armoured Division that formed the “Devil’s Triangle.” Its capture would open the way to Pasrur and crossings over the Marala-Ravi Link Canal. The Indian armoured division was to isolate Chawinda by again manoeuvring from the west and cutting the road Chawinda-Pasrur, while 6th Mountain Division was to initially capture villages in the vicinity of the town for a base to attack on Chawinda.
In the first phase, two regiments of the 1st Armoured Brigade of the Indian armoured division advanced simultaneously with Hodson’s Horse aiming to secure line Fatehpur-Sodreke, and Poona Horse heading to capture Jassoran. The advance by Hodson’s Horse was contested by the Guides with two depleted squadrons of M48s – one of them was of 11th Cavalry. Under repeated attacks, it finally conceded the Badiana-Chawinda road but in the whole day’s intense battle Hodson’s Horse advanced only three kilometres. Having suffered considerable attrition, the Guides was taken out of battle, and 19th Lancers now held the space between Badiana and Pasrur. Hudson’s Horse was expected to head towards Badiana and 19th Lancers decided to strike its flank with a squadrons and a half. However, the Indian Centurions took a heavy toll and despite a dashing charge, 19th Lancer’s attack stalled. To bring the regiment back to strength, that night 10 serviceable M48s left with the Guide were grouped with the regiment as an additional squadron. The intensity of the week’s fighting is demonstrated by the fact that three Patton regiments operating in this sector had been reduced to one.
Centurion tanks of Hodson's Horse exiting the Sialkot Sector in March 1966 after the Tashkent Agreement
Further right, the attack by Poona Horse and infantry struck a company of 3rd Frontier Force, which was supported by a troop of Shermans. The Pakistani tanks held their fire because of an earlier incidence of fratricide involving 19th Lancers, and paid the price by losing two Shermans. Under pressure 3rd Frontier Force wilted and Jassoran fell. Indian 8th Garwal Rifles moved up to support Poona Horse for the second phase i.e. the capture of Butur Dograndi. Both in their approach and attack, the Garwalis suffered terrible casualties from severe artillery shelling and only secured a portion of the village, where they were joined by two squadrons of Poona Horse.
‘Kaka’ Nisar reinforced Raza’s squadron and anxiously waited for a troop from ‘Mad’ Effendi’s squadron on the right. The moment it arrived, he attacked Poona Horse
Less than two kilometres ahead were the gun positions of the artillery of 6th Armoured Division, which were now being showered with machinegun fire. A call of “Tank Alert” was sounded and preparations were made to receive this menace, but the guns continued to fire at this crucial stage. Before Poona Horse could consolidate, it was struck on the flank by nine tanks of ‘C’ Squadron of 25th Cavalry commanded by Raza. He had been injured at Phillaurah and had forcibly discharged himself after two days in Sialkot CMH. The severe fire of tanks, recoilless rifles, Cobra ATGMs and artillery, forced Poona Horse to withdraw to Jassoran. Raza was awarded a Sitara-e-Jurat.
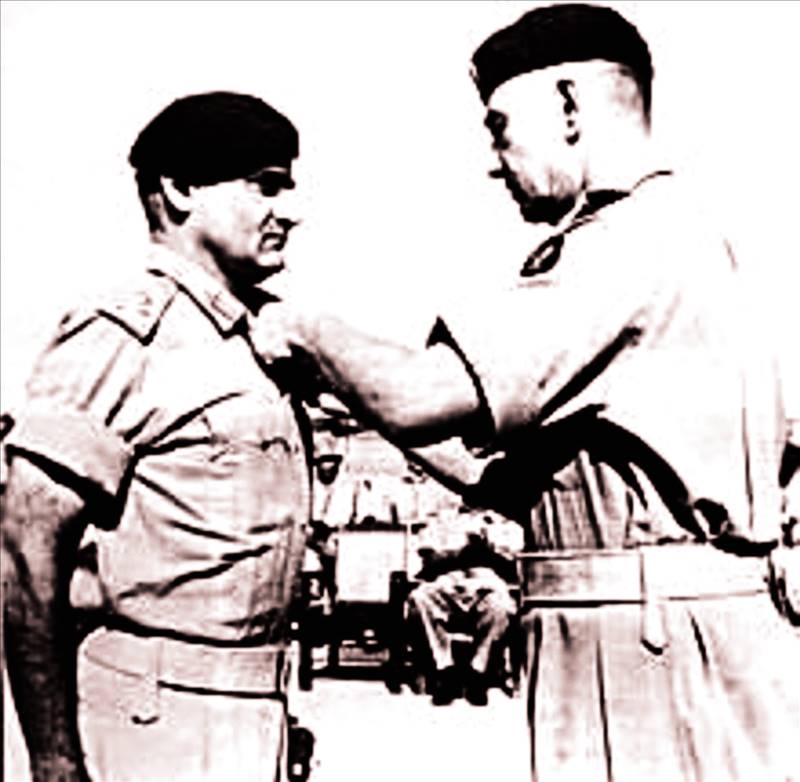
Maj Gen Abrar Hussain, GOC 6th Armoured Division, being awarded the Hilal-e-Jurat by the C-in-C Gen Musa
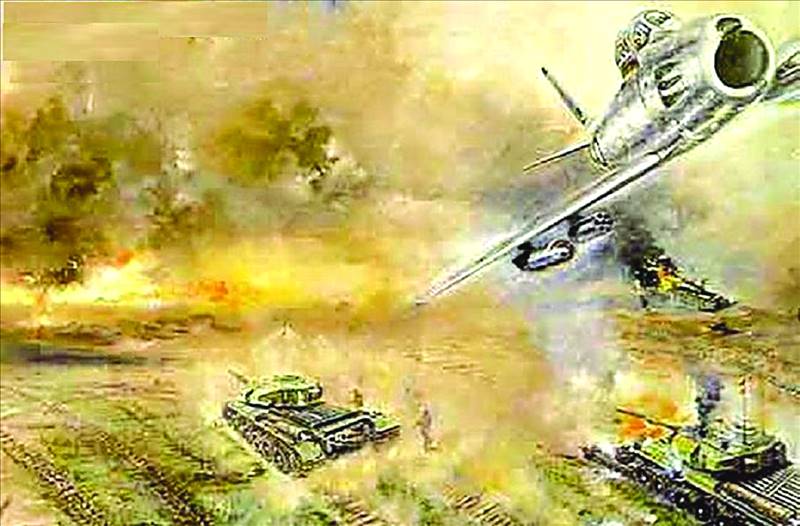
The withdrawal by 3rd FF had exposed the entire left flank of the defences at Chawinda to the Indian main attack and the situation was becoming desperate. All that lay between the Indian armour and its objective was a thin line of the remnants of Raza’s squadron of M48s and a depleted Sherman squadron. A timely airstrike by Sabres directed by an L-19 Light Observation Aircraft gave the defenders breathing space. The Pakistan Air Force had been extremely supportive from the first day of the Indian offensive in the Sialkot Sector. In fact, it was largely due to their strikes at the administrative vehicles of the Indian 1st Armoured Division on the first day of its attack that forced it to take a tactical pause. On 11 September it was because of the timely help by the PAF that remnants of 11th managed to disengage from Phillaura.
The Garhwalis and Poona Horse again advanced back into Butur Dograndi from where the Indian tanks were shooting up vehicles moving on the road leading from Chawinda to Pasrur. ‘Kaka’ Nisar reinforced Raza’s squadron with the two tanks of the RHQ, and anxiously waited for a troop from ‘Mad’ Effendi’s squadron on the right. The moment it arrived, he attacked Poona Horse, which was finally driven out of Butur Dograndi, where its brave commanding officer Ardisher Tarapore had been mortally wounded by artillery and his tank destroyed. From this tank was recovered a copy of an Operational Order issued by the headquarters of the Indian 1st Armoured Brigade on 13 September, which stated that, “The enemy morale is low and their command and control is NOT too effective.”
Indian Centurions under attack by Pakistani F-86 Sabres during the Battle of Chawinda in the 1965 war
The Black Elephant Division had not succeeded in isolating Chawinda, and the initiative was shifting in favour of 6th Armoured Division. The next day the Garhwali battalion holding Butur Dograndi was attacked and in spite of its determined resistance, forced to withdraw after it was pounded by 84 guns of the corps artillery. HQ 4th Armoured Brigade which had arrived from Khem Karan was now defending Badiana with 19th Lancers, 22nd Cavalry and 14th Frontier Force. On 18 September it attacked an Indian salient between Badiana and Chawinda and pushed the Indian back across the railway line destroying a number of Centurions and RRs.
It was the type of battle that only an armoured division knows how to execute, and has the resources to fight
Under pressure from the Western Command, the Indian I Corps continued with the attack by 6th Mountain Division to capture Chawinda. In support, the division was allocated the artillery of the corps as well as the armoured division. The attack was launched on the night of 18/19 September and after some desperate fighting, by dawn the division managed to close up to the railway line to the west of Chawinda. However, before they had time to dig in, the two Indian brigades caught the entire fury of the tanks of 25th Cavalry, the infantry weapons and the corps artillery, which the Indians had made no effort to neutralise.
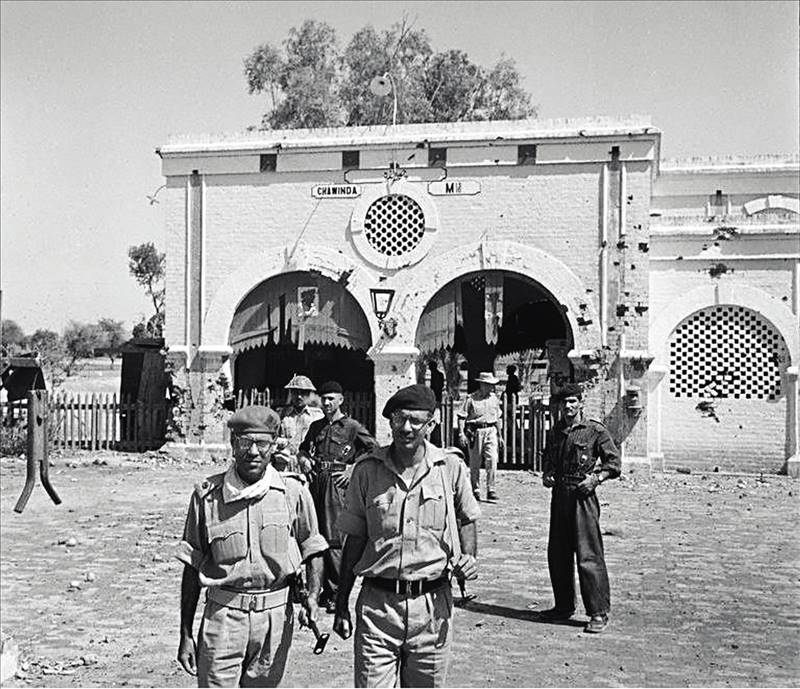
Battle scars on the railway station at Chawinda, which lay in the path of Indian armour heading onwards to cut the road to Pasrur
The fate of 6th Mountain Division was unknown to Hodson’s Horse, which advanced in the morning to protect its right flank. This presented an opportunity to 19th Lancers to extract retribution for the casualties it had suffered from the Centurions of Hodson’s Horse three days earlier. Catching Hodson’s Horse from a flank, it rapidly destroyed eight Centurions and the regiment limped back. Two hours later the Indian Air Force made one of its rare showing over the battle zone, and eight aircrafts attacked 19th Lancers. The only tank hit was of Maj Kiani, who succumbed to his wounds and was awarded a Sitara-e-Jurat. Early next morning marked the regiment’s most satisfying accomplishment when it surprised a squadron of Hodson’s Horse, which was breaking leaguer and it abandoned some of its Centurions.
On the morning of 20 September, 6th Armoured Division held the same position as on the morning of the first battle of Chawinda seven days earlier. The opportunity that was handed on a plate to the Indian armoured division, with the untimely changeover at Phillaurah was wasted. The stand by 11th Cavalry at Phillaurah on the morning of 11 September followed by the charge of the Guides enabled 6th Armoured Division to rebalance itself.
The battle against the Indian armoured division from the moment it reached Phillaurah on 8 September, had a great deal of fluidity. In many ways it bore the characteristics of a mobile defence by 6th Armoured Division which constituted an aggressive posture to deny space; counter-manoeuvres and quick counter-attacks by tanks to unbalance the Indians; regrouping of regiments to regain balance; defending pivots of the Devil’s Triangle; heavy concentrations of fire by artillery deployed well forward; protecting the gun areas with tanks; effective air support; and employing assets like army aviation to provide information and timely warning. Alongside armour, 6th Armoured Division used every available component to its fullest during the war including the light observation aircrafts, motorised infantry, recce troops, the artillery, ground air support missions, etc. It was the type of battle that only an armoured division knows how to execute, and has the resources to fight, and it proved its relevance in a scenario of a war between Pakistan and India then and in the future.
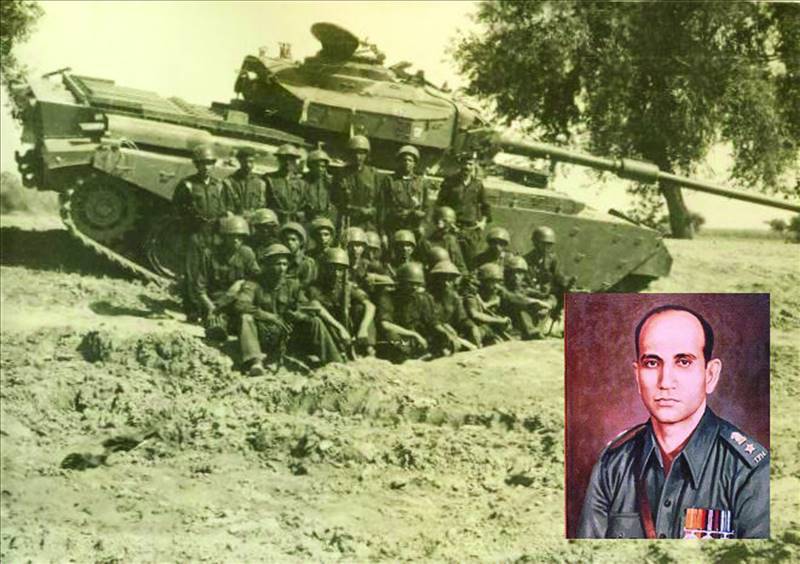
In this intense battle where fortunes swung in both directions, two men stood out for their resilience – Kaka Nisar who commanded 25th Cavalry and the GOC of 6th Armoured Division, Maj Gen Abrar Hussain. Abrar entered the 1965 War as an untried dark horse with no experience of armour and emerged with flying colours, to the dismay of some of his contemporaries. He was awarded with a well-deserved Hilal-e-Jurat, and the C-in-C, Gen Musa while paying tribute to the formation Abrar commanded gave it the epitaph of ‘Men of Steel’.